Why a retrobike?
 The coolest people of every generation have an icon. During the 1960s, among the rock n’ roll set on Chelsea’s Kings Road, it was the Jaguar E-Type. In the 2010s, the trendsetters are the 20-something media types of Shoreditch. They wear skinny jeans that stop above the ankle, and the coolest have meticulously manicured moustaches. Their preferred mode of transportation is a retrobike, specifically a fixed-wheel road bike from the 1970s or 80s, such as a Colnago or a Mercian. Less cool, but still way ahead of most of the population, is a slightly older male – mid 30s to mid 40s – typically a graphic designer with a penchant for classic trainers and vintage mountain bikes. On dry spring and summer days, they can be spotted cycling to work at a design studio in Islington on classic mountain bikes from the late 1980s and early 1990s. Some are on top-of-the-range dream bikes like the Klein Attitude, Fat Chance Yo Eddy, and the Yeti FRO, while others ride models like the Muddy Fox Courier, or an early Marin, which – to retrobikers – are just as cool from a design point of view. The main reason for this is that the century-old classic bicycle design reached a peak around this time, before technology such as suspension and hydraulic brakes changed the game. In essence, a retrobike, from entry-level to top end, is a celebration of classic bike design.
Decide on a model
Firstly, decide on the style of retro bike that will best suit you. For example, an early steel mountain bike from the late 1980s, with relaxed geometry, an upright riding position, with braze-ons for a rack and mudguards, makes a perfect ride for city commutes, canal paths and smooth trails. But if you fancy a more intense riding experience, a racier mountain bike from the mid 90s, with a stretched out riding position, sloping top tube, short chainstays, and snappier ride, would fit the bill. Just one word of warning here; if that’s the kind of bike you lusted after as a teenager, your middle-aged back might not find it as alluring as your adolescent imagination did. If you’re looking for inspiration pretty much any Marin from 1988 to 1994, a Saracen from 88 to 92 or a Kona from the early 90s would be great starting points.
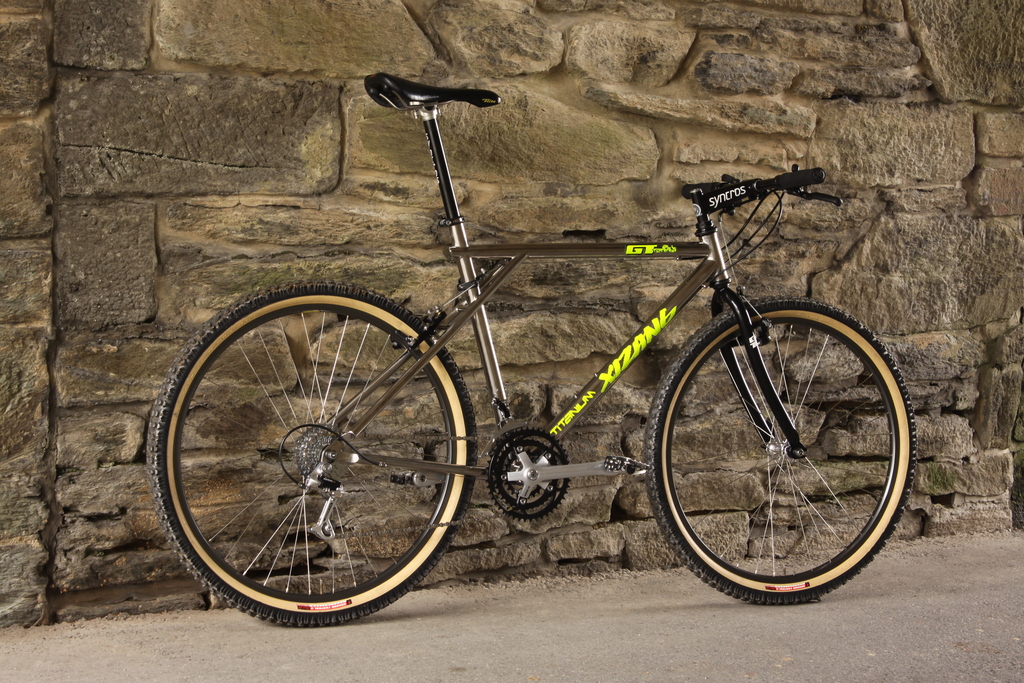
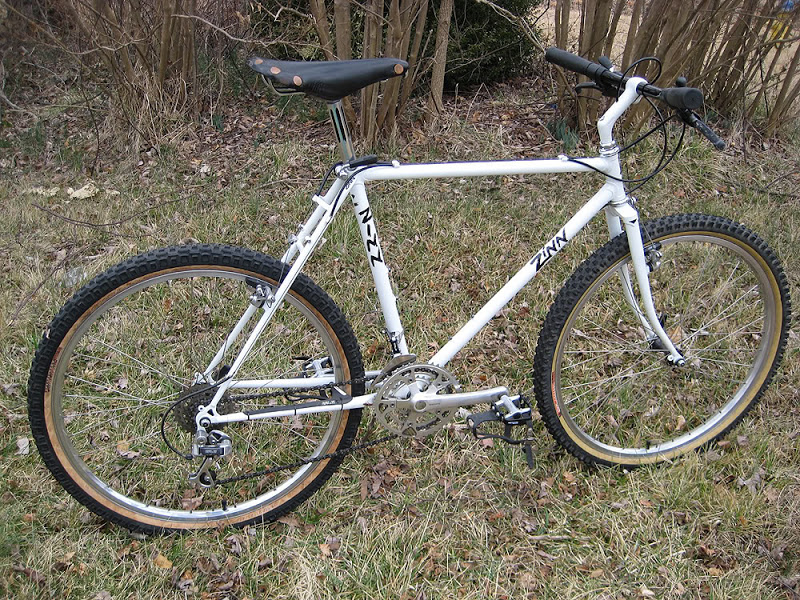
[1] 90s GT Xizang retro mountain bike - a full on race machine. [2] - 80s Zinn retro mountain bike - a much more relaxed machine
Narrow down your requirements
Once you’ve decided on a bike, work out what size you need. Many manufacturers’ catalogues are in the retrobike archive, with the geometry and dimensions for different models.
There was a trend in the 90s for people to ride mountain bikes on the small size, with long, extended seat posts and 150mm stretched-out stems. This was partly because smaller frames are inherently stronger, as the shorter head tube makes the frame closer to a true triangle, and partly to provide more clearance for technical terrain.
If you are now seeking a bike to ride and enjoy, rather than shred around a jump park, throw down a black run, or even just hang on the wall, go for a bike frame that actually fits you. If might seem obvious, but there are quite a few experienced retrobikers who fall in love with a specific bike, or take a chance on an alluring frame, only to realise that in fact it’s the wrong size. Just look at the retrobike classifieds to see how common this is.
Sourcing a bike
There are lots of old bikes out there in decent condition, notwithstanding scratches, grime and dirt, and with patience you will find one in the size you’re after. The key is in sourcing one that has been looked after well, or sat unused in a garage for most of its life. Either way, the frame and forks are likely to be in good condition, free of rust or cracks, and can provide a perfect foundation for a customized retrobike that could last several more decades.
It’s best to look for frame and forks together, as sourcing matching forks for a salvaged frame can be more trouble (and cost) than it’s worth. You can find old bicycles in skips, at dumps and refuse centres, or even abandoned in hedges. Also check out garage and yard sales, the classfieds in your local newspaper, and police auctions of stolen bikes. And don’t forget online sites such as Ebay and Gumtree that are worth scouring for bargains. Although as the retrobike scene grows, beware of overpriced bikes tagged up as “retro” or “vintage”.
One of the better places to source old bikes, frames and forks, is of course, the retrobike classified section, mtbs for sale. Linked to this is the retrobike auction and marketplace watch. A lot of interesting stuff comes up including unfinished projects, pristine classics, left-field esoterica, and a huge variety of retro parts.
Checking for rust
The first thing to check on a steel frame is rust. Are there rust patches under the bottom bracket, chainstays, on the seat tube, or around the bottom of the head tube? Is the seat post seized? If so, the seat tube is likely rusted, and this will need investigating. It could be a straightforward, simple fix, but it could be a badly rusted seat tube that will need replacing. This would be more trouble and cost than it’s worth, on all but the most valuable frames.
Ideally, you should remove the bottom bracket to ensure it is not seized/rusted in place, and to inspect the bottom bracket shell and the threads. You might also be able to see if there is any rust around the inside of the down tube, seat tube and chainstays.
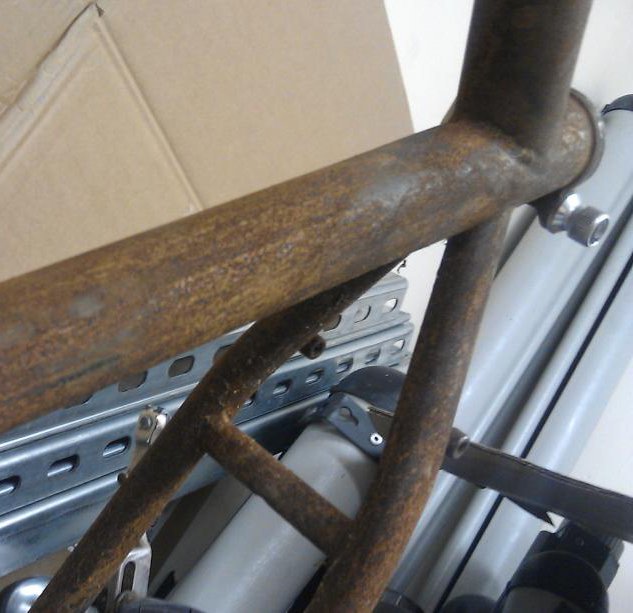
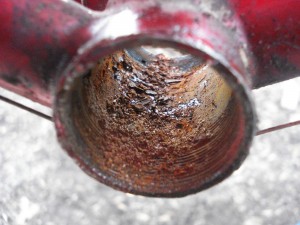
[l] extreme retro rust. [r] rusty bottom bracket shell
Checking for cracks
Next carefully examine the frame and forks for cracks. For aluminium frames and forks, this is especially important, because while cracks in steel can be worth repairing, cracks in aluminium are generally terminal, and rarely worth fixing. Do this inspection outside in daylight where you can see what you’re looking at, and not in a dimly-lit garage or shed. If the bike is covered in grime or dirt, spend five minutes cleaning it – ideally with degreaser.
Check the tube junctures, around the head tube, under the top of the down tube where it meets the head tube, all around the bottom bracket, the seat tube-top tube-seatstays juncture, and the dropouts. Also inspect inside the chainstays to make sure the rear tyre has not worn away the frame.
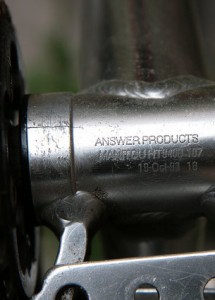
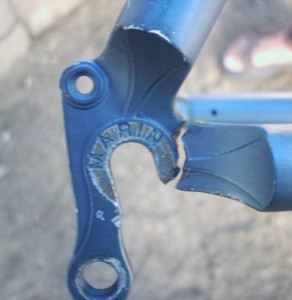
[l] cracked bottom bracket shell on a retro Manitou frame [r] cracked dropout
Alignment
Crouching behind the bike, check the alignment. Does the rear triangle line up with the front triangle? Are the wheels aligned with each other? Look from the front as well. If possible, take the bike for a quick ride to see how it handles after making sure that it’s safe to ride (wheel quick releases done up tight, brakes working, tyres inflated, handlebars, stem and forks tight and solid). You should be able to feel any alignment issues from a quick ride.
Appearance
Scratches and chips in the paint are usually just cosmetic, and if they are really bad then you could get the frame resprayed or powdercoated. If the frame and forks are otherwise in good condition and fit you then don’t let poor paintwork put you off. Factor in the cost of a respray (about 130 pounds) or powdercoat (60 pounds) and use this as a negotiating tool when making an offer.
Restoring a retrobike
The retrobike encompasses a wide range of machines, from rusting, grimy rat bikes to pristine, period-correct bikes.
A basic retro bike
You could get a rat bike up and running for almost nothing if you are lucky enough to find one abandoned at your local refuse centre. Factor in the cost of brake blocks, a few cables, maybe a couple of tyres, and you’re good to go. It is virtually thief-proof, because it looks almost worthless, but functions perfectly for city commuting.
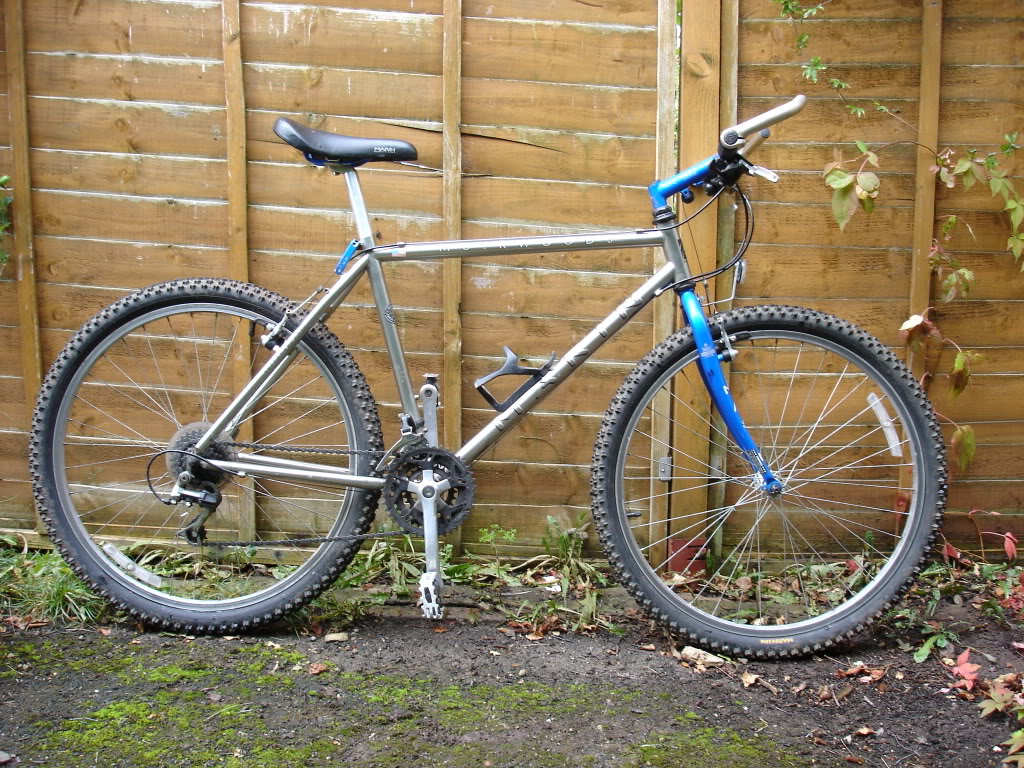
Basic retro bike - Marin Muirwoods
Pristine period-correct retro bike
At the other extreme is the pristine, period-correct retrobike. The easiest way to do this is to buy one in very good condition, which will require very little to get it to perfection. The good news is that retro bikes in exceptional condition are not necessarily expensive. With patience, you could pick up a mid-range vintage mountain bike in very good condition for around 100 pounds. More desirable makes and higher-end models command much higher prices, but you can still get something really cool without breaking the bank.
If you want to take on a major project and restore a vintage mountain bike to first-class condition, with all of the period-correct parts and components, and looking as good as the day it rolled onto the shop floor, a word of warning: Do not be under any illusions; restoring a bike to this condition is a lengthy and involved process. You will be selecting, sourcing and buying items; cleaning, polishing and assembling parts and components; and, finally, building the bike yourself. It takes time, money, patience and skill.
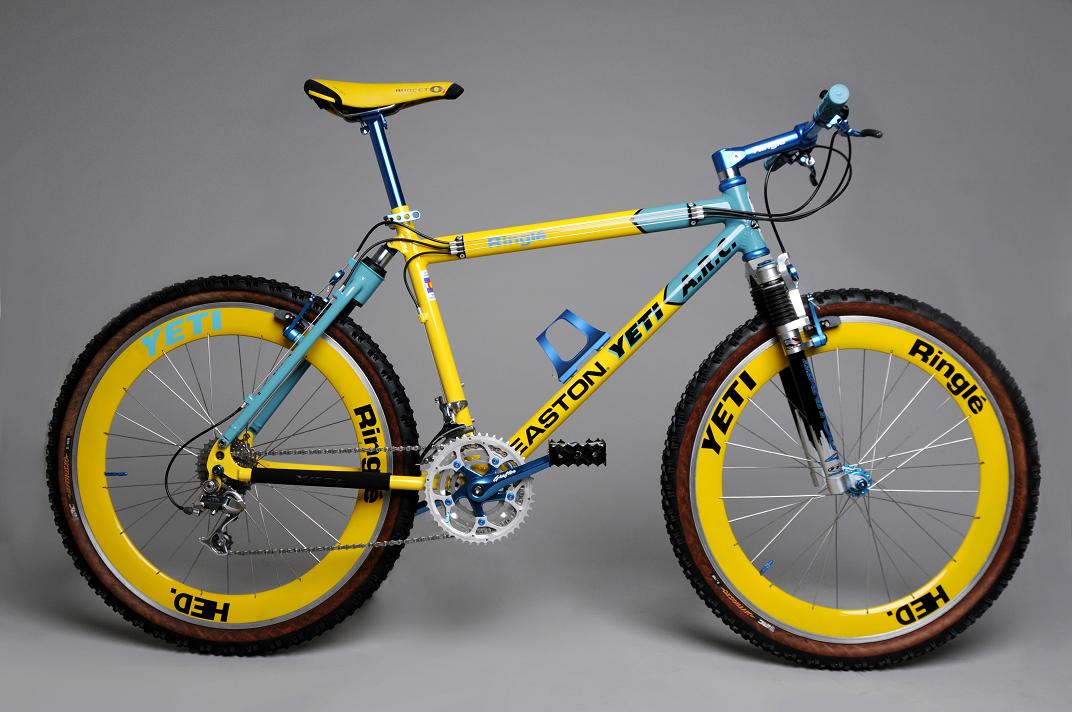
Period correct retro bike - Yeti ARC
Practical retro bikes
Between rat bikes and pristine bikes are practical retro bikes, and this is where you can get creative and customize your bike to fulfil whatever role you want. Go down this route and you can get yourself a high-quality machine for a fraction of its original retail price. This is far easier and cheaper than going for a period-correct build. You will also be able to tune your bike to your own preference, for example with a different stem or saddle, or newer, more efficient brakes. Depending on the spacing of the rear triangle, you could also fit a newer drivetrain and run a modern 9 or 10-speed cassette.
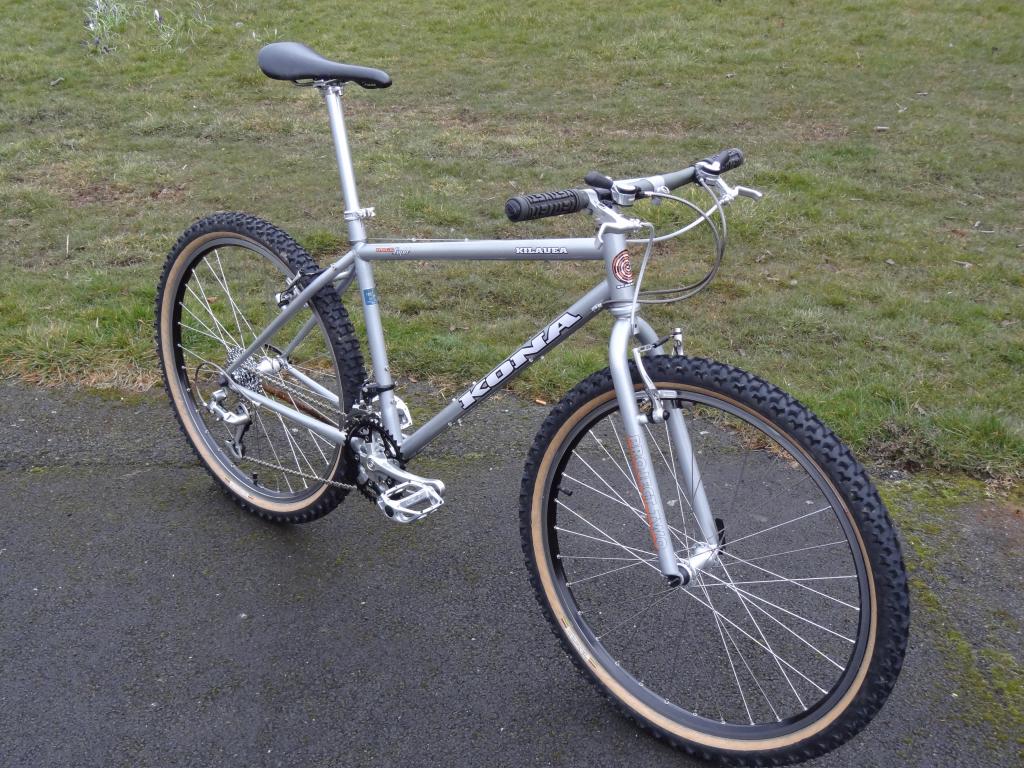
Practical retro bikes - Kona Kilauea
It is a good idea to decide at the beginning of a project what you are doing, so you can work out a rough budget, timeframe, and specific end result. If you are going for a period-correct build, you will want to salvage any original parts that are in good enough condition to use on your rebuild. So have a print out of the manufacturer’s original specification to hand, be sure to check the retrobike archive for this information.
Inspection
Firstly, strip the bike down completely. Remove the bottle cage bolts and other removeable parts, including all cables, derailleurs, the seat collar/bolt, brakes and any cable guides. Leave the headset cups inside the frame unless you have a headset puller. Clean the whole frame and fork, including the threads inside the bottom bracket and rear derailleur hanger, and on the fork steerer, with degreaser. Now assess the parts you have just removed.
It is a good idea to have the original manufacturer’s specification to hand, so you can work out what is original and what has been replaced. Most owners replace parts over time, as they wear out or break, and some change saddles, stems or handlebars to suit their own preference.
Drivetrain
Work out if the drivetrain is original by consulting the manufacturer’s original specification for the bike. If it is original, then the chances are the chain, chainrings and cassette are worn and will need replacing. Check wear using a chain checker; if it shows more than 0.5mm of wear across 12 chain links, look at the cassette and the chainrings. Clean off any muck, and look carefully at the profile of the teeth. If any teeth have a curved profile with a pointy, sharks-tooth shape rather than a square top, you will need to replace the drivetrain. Depending on its age, your mountain bike will have an 18, 21 or 24-speed drivetrain, made by Shimano, Suntour or even Campagnolo.
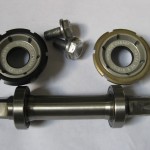
Bottom bracket
The bottom bracket may need replacing. Before sealed units became popular in the mid 1990s, most mountain bikes had cup-and-cone bottom brackets, with a solid axle and two screw-in cups containing loose bearings. Clean your old unit thoroughly, and inspect.
Check for pitting inside the cups and on the axle, where the bearings sit. These areas are prone to corrosion unless regularly cleaned and regreased. If there are any signs of corrosion or wear, indicated by ridges on the bearing surfaces, you will need to replace the bottom bracket.
If the axle and races are unmarked, and the bearings in good condition then you can reuse the bottom bracket parts. However, it is good practice to replace the bearings with new ones anyway, so at least you know they are brand new and all perfectly spherical. Take a few old ones into a bearing shop so that they can give you a complete set of bearings in the correct size.
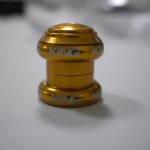
Headset
Now look at the headset. As with the bottom bracket, cup-and-cone units were the industry standard until the mid 90s, and they suffer from the same deterioration issues.
Soak all the parts with degreaser and wipe clean. Check the surfaces of the races for smoothness, ridges and pitting, and the bearings and bearing races for overall condition. If it’s all in good, unmarked condition, reassemble with fresh grease. For peace of mind, consider replacing the bearings regardless.
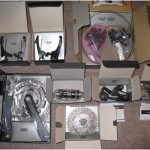
Sourcing period-correct parts
Replacement parts for old groupsets are no longer made, but virtually everything you might need is still available, ranging in condition from perfect NOS (new old stock) to worn out. The best place to tap into this thriving trade is on ebay and the retrobike.co.uk classifieds.
Work out what you need to replace, and do some research to get an idea of price. Some parts, such as the unmarked 7-speed Shimano Deore XT thumbshifters are highly sought after, and valued accordingly. If you must have every part perfect, then you will need lots of patience and very deep pockets. For such retrobikers, who might be a little OCD, remember that a seller’s definition of ‘perfect’ may not chime with your own. And parts can sustain knocks and damage in transit. Ask for detailed photos before making an offer, and agree on packaging methods and – if necessary – insurance during transit with the seller.

Paint finish
If the paint is looking a bit tired, dull or faded, but otherwise in good condition, T-cut paint restorer can bring back much of the original shine. Spend a few hours polishing the frame and forks with T-cut, and it could save you 200 pounds and a lot of time and trouble having to get a respray and fit new decals.
If the frame and forks are badly scratched or showing signs of rust, consider getting a professional respray. Check on retrobike.co.uk for rebuild threads about your particular model, and ask the experts for the manufacturer’s original colour codes if you want to go original. Decals occasionally pop up for sale on classifieds, or you can have new ones made to order by Gil-M, among others.
Experienced retrobikers can advise on the best places to get a frame resprayed. It is best to get the decals first and drop them off with the framebuilder when you hand over your frame and fork for respraying, so the decals can be applied directly on top of the colour coat before the clear coat of lacquer. The lacquer protects the decals and prevents them from peeling off as easily, and will keep your bike looking better for longer.
Buying, restoring and ultimately riding a vintage mountain bike is a rewarding experience. Good luck with your search, when you have found something be sure to share it in our reader’s bike section.

Decide on a model
Firstly, decide on the style of retro bike that will best suit you. For example, an early steel mountain bike from the late 1980s, with relaxed geometry, an upright riding position, with braze-ons for a rack and mudguards, makes a perfect ride for city commutes, canal paths and smooth trails. But if you fancy a more intense riding experience, a racier mountain bike from the mid 90s, with a stretched out riding position, sloping top tube, short chainstays, and snappier ride, would fit the bill. Just one word of warning here; if that’s the kind of bike you lusted after as a teenager, your middle-aged back might not find it as alluring as your adolescent imagination did. If you’re looking for inspiration pretty much any Marin from 1988 to 1994, a Saracen from 88 to 92 or a Kona from the early 90s would be great starting points.


[1] 90s GT Xizang retro mountain bike - a full on race machine. [2] - 80s Zinn retro mountain bike - a much more relaxed machine
Narrow down your requirements
Once you’ve decided on a bike, work out what size you need. Many manufacturers’ catalogues are in the retrobike archive, with the geometry and dimensions for different models.
There was a trend in the 90s for people to ride mountain bikes on the small size, with long, extended seat posts and 150mm stretched-out stems. This was partly because smaller frames are inherently stronger, as the shorter head tube makes the frame closer to a true triangle, and partly to provide more clearance for technical terrain.
If you are now seeking a bike to ride and enjoy, rather than shred around a jump park, throw down a black run, or even just hang on the wall, go for a bike frame that actually fits you. If might seem obvious, but there are quite a few experienced retrobikers who fall in love with a specific bike, or take a chance on an alluring frame, only to realise that in fact it’s the wrong size. Just look at the retrobike classifieds to see how common this is.
Sourcing a bike
There are lots of old bikes out there in decent condition, notwithstanding scratches, grime and dirt, and with patience you will find one in the size you’re after. The key is in sourcing one that has been looked after well, or sat unused in a garage for most of its life. Either way, the frame and forks are likely to be in good condition, free of rust or cracks, and can provide a perfect foundation for a customized retrobike that could last several more decades.
It’s best to look for frame and forks together, as sourcing matching forks for a salvaged frame can be more trouble (and cost) than it’s worth. You can find old bicycles in skips, at dumps and refuse centres, or even abandoned in hedges. Also check out garage and yard sales, the classfieds in your local newspaper, and police auctions of stolen bikes. And don’t forget online sites such as Ebay and Gumtree that are worth scouring for bargains. Although as the retrobike scene grows, beware of overpriced bikes tagged up as “retro” or “vintage”.
One of the better places to source old bikes, frames and forks, is of course, the retrobike classified section, mtbs for sale. Linked to this is the retrobike auction and marketplace watch. A lot of interesting stuff comes up including unfinished projects, pristine classics, left-field esoterica, and a huge variety of retro parts.
Checking for rust
The first thing to check on a steel frame is rust. Are there rust patches under the bottom bracket, chainstays, on the seat tube, or around the bottom of the head tube? Is the seat post seized? If so, the seat tube is likely rusted, and this will need investigating. It could be a straightforward, simple fix, but it could be a badly rusted seat tube that will need replacing. This would be more trouble and cost than it’s worth, on all but the most valuable frames.
Ideally, you should remove the bottom bracket to ensure it is not seized/rusted in place, and to inspect the bottom bracket shell and the threads. You might also be able to see if there is any rust around the inside of the down tube, seat tube and chainstays.


[l] extreme retro rust. [r] rusty bottom bracket shell
Checking for cracks
Next carefully examine the frame and forks for cracks. For aluminium frames and forks, this is especially important, because while cracks in steel can be worth repairing, cracks in aluminium are generally terminal, and rarely worth fixing. Do this inspection outside in daylight where you can see what you’re looking at, and not in a dimly-lit garage or shed. If the bike is covered in grime or dirt, spend five minutes cleaning it – ideally with degreaser.
Check the tube junctures, around the head tube, under the top of the down tube where it meets the head tube, all around the bottom bracket, the seat tube-top tube-seatstays juncture, and the dropouts. Also inspect inside the chainstays to make sure the rear tyre has not worn away the frame.


[l] cracked bottom bracket shell on a retro Manitou frame [r] cracked dropout
Alignment
Crouching behind the bike, check the alignment. Does the rear triangle line up with the front triangle? Are the wheels aligned with each other? Look from the front as well. If possible, take the bike for a quick ride to see how it handles after making sure that it’s safe to ride (wheel quick releases done up tight, brakes working, tyres inflated, handlebars, stem and forks tight and solid). You should be able to feel any alignment issues from a quick ride.
Appearance
Scratches and chips in the paint are usually just cosmetic, and if they are really bad then you could get the frame resprayed or powdercoated. If the frame and forks are otherwise in good condition and fit you then don’t let poor paintwork put you off. Factor in the cost of a respray (about 130 pounds) or powdercoat (60 pounds) and use this as a negotiating tool when making an offer.
Restoring a retrobike
The retrobike encompasses a wide range of machines, from rusting, grimy rat bikes to pristine, period-correct bikes.
A basic retro bike
You could get a rat bike up and running for almost nothing if you are lucky enough to find one abandoned at your local refuse centre. Factor in the cost of brake blocks, a few cables, maybe a couple of tyres, and you’re good to go. It is virtually thief-proof, because it looks almost worthless, but functions perfectly for city commuting.

Basic retro bike - Marin Muirwoods
Pristine period-correct retro bike
At the other extreme is the pristine, period-correct retrobike. The easiest way to do this is to buy one in very good condition, which will require very little to get it to perfection. The good news is that retro bikes in exceptional condition are not necessarily expensive. With patience, you could pick up a mid-range vintage mountain bike in very good condition for around 100 pounds. More desirable makes and higher-end models command much higher prices, but you can still get something really cool without breaking the bank.
If you want to take on a major project and restore a vintage mountain bike to first-class condition, with all of the period-correct parts and components, and looking as good as the day it rolled onto the shop floor, a word of warning: Do not be under any illusions; restoring a bike to this condition is a lengthy and involved process. You will be selecting, sourcing and buying items; cleaning, polishing and assembling parts and components; and, finally, building the bike yourself. It takes time, money, patience and skill.

Period correct retro bike - Yeti ARC
Practical retro bikes
Between rat bikes and pristine bikes are practical retro bikes, and this is where you can get creative and customize your bike to fulfil whatever role you want. Go down this route and you can get yourself a high-quality machine for a fraction of its original retail price. This is far easier and cheaper than going for a period-correct build. You will also be able to tune your bike to your own preference, for example with a different stem or saddle, or newer, more efficient brakes. Depending on the spacing of the rear triangle, you could also fit a newer drivetrain and run a modern 9 or 10-speed cassette.

Practical retro bikes - Kona Kilauea
It is a good idea to decide at the beginning of a project what you are doing, so you can work out a rough budget, timeframe, and specific end result. If you are going for a period-correct build, you will want to salvage any original parts that are in good enough condition to use on your rebuild. So have a print out of the manufacturer’s original specification to hand, be sure to check the retrobike archive for this information.
Inspection
Firstly, strip the bike down completely. Remove the bottle cage bolts and other removeable parts, including all cables, derailleurs, the seat collar/bolt, brakes and any cable guides. Leave the headset cups inside the frame unless you have a headset puller. Clean the whole frame and fork, including the threads inside the bottom bracket and rear derailleur hanger, and on the fork steerer, with degreaser. Now assess the parts you have just removed.
It is a good idea to have the original manufacturer’s specification to hand, so you can work out what is original and what has been replaced. Most owners replace parts over time, as they wear out or break, and some change saddles, stems or handlebars to suit their own preference.

Drivetrain
Work out if the drivetrain is original by consulting the manufacturer’s original specification for the bike. If it is original, then the chances are the chain, chainrings and cassette are worn and will need replacing. Check wear using a chain checker; if it shows more than 0.5mm of wear across 12 chain links, look at the cassette and the chainrings. Clean off any muck, and look carefully at the profile of the teeth. If any teeth have a curved profile with a pointy, sharks-tooth shape rather than a square top, you will need to replace the drivetrain. Depending on its age, your mountain bike will have an 18, 21 or 24-speed drivetrain, made by Shimano, Suntour or even Campagnolo.

Bottom bracket
The bottom bracket may need replacing. Before sealed units became popular in the mid 1990s, most mountain bikes had cup-and-cone bottom brackets, with a solid axle and two screw-in cups containing loose bearings. Clean your old unit thoroughly, and inspect.
Check for pitting inside the cups and on the axle, where the bearings sit. These areas are prone to corrosion unless regularly cleaned and regreased. If there are any signs of corrosion or wear, indicated by ridges on the bearing surfaces, you will need to replace the bottom bracket.
If the axle and races are unmarked, and the bearings in good condition then you can reuse the bottom bracket parts. However, it is good practice to replace the bearings with new ones anyway, so at least you know they are brand new and all perfectly spherical. Take a few old ones into a bearing shop so that they can give you a complete set of bearings in the correct size.

Headset
Now look at the headset. As with the bottom bracket, cup-and-cone units were the industry standard until the mid 90s, and they suffer from the same deterioration issues.
Soak all the parts with degreaser and wipe clean. Check the surfaces of the races for smoothness, ridges and pitting, and the bearings and bearing races for overall condition. If it’s all in good, unmarked condition, reassemble with fresh grease. For peace of mind, consider replacing the bearings regardless.

Sourcing period-correct parts
Replacement parts for old groupsets are no longer made, but virtually everything you might need is still available, ranging in condition from perfect NOS (new old stock) to worn out. The best place to tap into this thriving trade is on ebay and the retrobike.co.uk classifieds.
Work out what you need to replace, and do some research to get an idea of price. Some parts, such as the unmarked 7-speed Shimano Deore XT thumbshifters are highly sought after, and valued accordingly. If you must have every part perfect, then you will need lots of patience and very deep pockets. For such retrobikers, who might be a little OCD, remember that a seller’s definition of ‘perfect’ may not chime with your own. And parts can sustain knocks and damage in transit. Ask for detailed photos before making an offer, and agree on packaging methods and – if necessary – insurance during transit with the seller.

Paint finish
If the paint is looking a bit tired, dull or faded, but otherwise in good condition, T-cut paint restorer can bring back much of the original shine. Spend a few hours polishing the frame and forks with T-cut, and it could save you 200 pounds and a lot of time and trouble having to get a respray and fit new decals.
If the frame and forks are badly scratched or showing signs of rust, consider getting a professional respray. Check on retrobike.co.uk for rebuild threads about your particular model, and ask the experts for the manufacturer’s original colour codes if you want to go original. Decals occasionally pop up for sale on classifieds, or you can have new ones made to order by Gil-M, among others.
Experienced retrobikers can advise on the best places to get a frame resprayed. It is best to get the decals first and drop them off with the framebuilder when you hand over your frame and fork for respraying, so the decals can be applied directly on top of the colour coat before the clear coat of lacquer. The lacquer protects the decals and prevents them from peeling off as easily, and will keep your bike looking better for longer.
Buying, restoring and ultimately riding a vintage mountain bike is a rewarding experience. Good luck with your search, when you have found something be sure to share it in our reader’s bike section.
Last edited by a moderator:
