Retro-modern fusion gravel build madness. The new Superb!

Not sure if you got around to improving the front brake but my top tip is to use a more rigid fork cable hanger.
The one i have seen in your pics flexes quite a bit and can be a canti performance killer.
I use a chunky cast item that was found on early Kona mtbs and i am pretty sure Dia-Compe made a chunky hanger, too, but they are rarer than the Kona item.
There is also the old Cannondale H-pipe but that is also rare though an exact copy is available from an asian source called Improvepart.

Another thing you could try are Swissstop BXP blue brake pads in cartridge holders. They really are a top notch pad, in all conditions, and they last a very long time. I use them on machined aluminium rim surfaces and have been really impressed.
 
Last edited:
Thank you.
The current hanger is a Tektro jobbie, like this one from SJS

I think it's reasonably robust, but if you think a different hanger will work better, that sounds like a good investment.

Retro P2 konas and improveparts both come in at £30 - ouch.

Swisstop pads are very good indeed - that's what I've been using on my commuter. Frannie's currently wearing blue Ritcheys.

I haven't done any improvements since getting the bike on the road last year - after a significant time spent retromodding, retrofitting and assembling the bike (none of the parts were intended to go together, remember) I decided to follow my own advice and "just ride the dang thing".

The brakes are OK for relaxed rides. They are certainly not good enough for racing or offroading, but the bike itself is a very different beast from what I've expected. The low BB that makes it such a great pleasure to ride on long gravel tracks and tarmac is the limiting factor if I want to take it offroad.
Got to remember that the tyres are also a limiting factor when it comes to braking performance offroad. I still need to test it out with knobblies if I wanted to take it on a gravel sportive. But truth is, my days of going fast or doing any moderate offroading are long gone.
I've got a 26er frame to build up at some point for a wee bit of daft bashing around the forest;).

I am extremely pleased with how it handles and how it rides, and this is what I was reaching for every time I'd go for a mixed-surface ride or for a relaxing ride with the kids or the Mrs.
 
When you click on links to various merchants on this site and make a purchase, this can result in this site earning a commission. Affiliate programs and affiliations include, but are not limited to, the eBay Partner Network.
Mmmh. That is old. 50s too at a guess.

There is a horrible steering lock on that and I would stay well clear of that contraption. From one of my tip finds:

11_rs-jpg.510174
I’ve plugged those lock holes with lock barrels I’ve removed from thrift store locking office cabinets. I epoxy them in. They don’t work but it makes for an original look. Sometimes you need to make a round cover if the lock hole is too big or enlarge the top of the hole and cut off most of the lock barrel.
 
My serial is 65469.

Here's a supposedly '59 randonneuse with 88k serial.

Here's a close up of the original derailleur. Note the spring going from a wee eyelet near the bottom bracket to the mech cage. I was wondering what that mount was for.
img_2012.jpg


And yes, there's a front mech!
img_2011.jpg
IMG_2989.jpeg
 
WARNING, GRAPHIC CONTENT!

Disclaimer: I do not promote doing this to your frame and there is some very serious damage that can be done to the frame and to yourself if you're not careful. Kids, do not attempt to do this without adult supervision. You'll only have yourself to blame. I warned you. I refuse to take any responsibility for your broken frames, floorboards and arms & legs. This is not a healthy pastime - please find yourself another hobby.
Also, you'll be at risk of getting grief from true retrobikers.

I've re-created the cold-setting process as promised.
I'm not expert - I've only done this 3 times and so far did not have the gates of hell open & swallow up me & my workshop.

I haven't clamped the bridges for the photo, but when doing the actual cold set, it is recommended that you clamp them so they don't break off.
Depending on stay shape, you can drill a wooden block to the right diameter, then cut it down the middle to make clamping blocks. Alternatively, wrap baking paper on the tubes and put some 5min epoxy on them + wooden blocks on top to shape the clamping blocks to your stays. Wait for it to set, remove the paper & you're ready to clamp.
If you're lucky, you might be able to get away with just a pair of cam clamps though.

Option 1: M8 threaded rod. I'm missing a nut on the inside of the DS dropout (couldn't be bothered threading it onto a 12in rod just for the photo:LOL:).
Spread to 130+15 by turning the [missing] nut, then unwind & check if the frame has budged. Increase the spread in 5mm increments & keep checking until you reach the target (might have to go as wide as 160 or more).
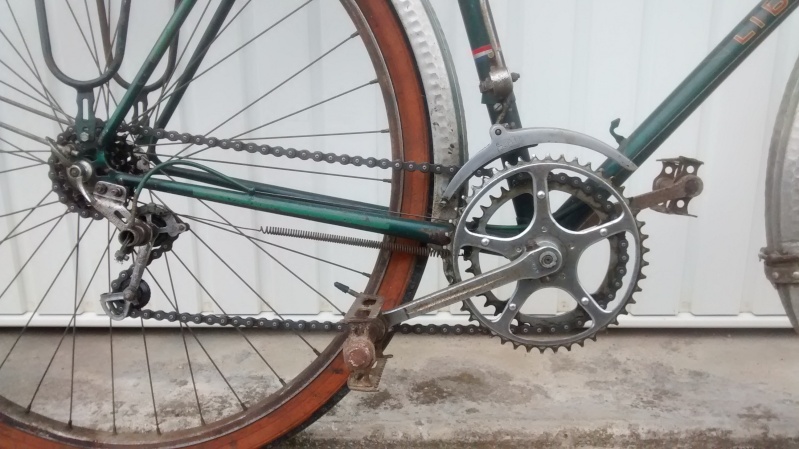
Almost stress-free, but you're likely to end up with DS stay moving out more than NDS due to the chainring crimping.
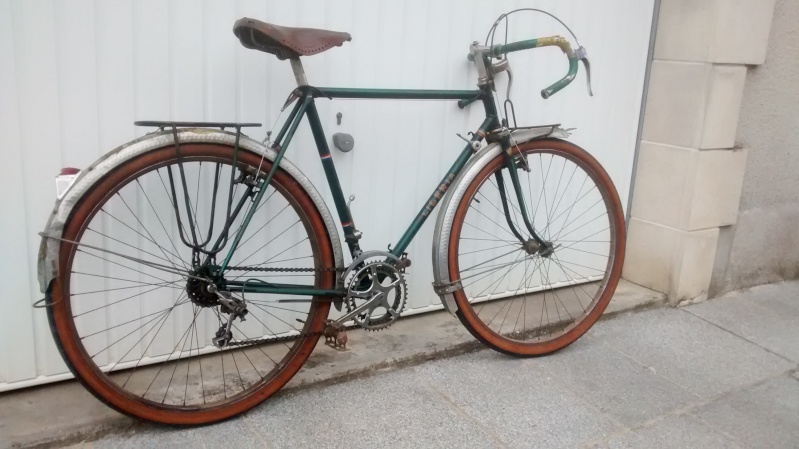
This is exactly what has happened with Frannie - most of the spread went to DS and had to be corrected.

Option 2: Floorboard method. Put an end of the floorboard onto a workbench, and stick the other end into the frame. push down on the board with your knee around the seat tube to generate leverage on the stays, pushing them in or out. The frame in the photo is hanging on the floorboard and only resting on the floor on the headtube).
If you want to bend the stay back in, you need to position the board differently - check Sheldon's website for the photo.
Each frame is different, so you'll need to get a feel for the frame but once you're on it, I found it surprisingly easy to get the right amount of bend.
Very stressful when doing for the first time.
You have Sheldon's blessing (as well as more detailed instructions on his website) to do it this way. Also, the same method is described in "Lugged bicycle frame construction" book, albeit if memory serves me right, this is done before brazing on the bridges (makes sense).
So the way I understand it, doing a retrofit cold-set only differs from the process of frame building in that you bend the stays from the bridges onwards, while a "proper" frame will be bent from the lugs and reinforced by longer bridges.

Once spread, you need to re-align the dropouts. I've got a cyclus aligning tool, which was purchased for about £34 on sale, delivered from Germany. Well worth the pennies.
Homemade, free from junk. I had this spread and realignment checked by a bike shop with a real tool and my homemade job was perfect. IMG_0318.jpeg
IMG_0709.jpeg

IMG_0710.jpeg
After spreading I use this homemade tool to check the frame alignment. IMG_1726.jpeg IMG_1725.jpeg

IMG_0820.jpeg
I spread with a furniture clamp. IMG_0304.jpeg
 
Re the brakes, there's certainly some flex in the front cable hanger.

My next step was to attempt using V-brakes. I can fit a travel adapter if the cable pull ratio is way off.
Just ordered a pair of Deores for my kids' net bike, so will try to fit them to Frannie first.
 
Re the brakes, there's certainly some flex in the front cable hanger.

My next step was to attempt using V-brakes. I can fit a travel adapter if the cable pull ratio is way off.
Just ordered a pair of Deores for my kids' net bike, so will try to fit them to Frannie first.
I didn’t like this type of adapter. It gives you twice the pull distance but half the torque which made my brakes too weak. An expensive piece for the garbage. If this is your plan I would ask others about their experience with these before buying them. I tried the problem solvers brand. I could have just been my combo of parts. I only tried them once so not a lot of varied experience here.


IMG_0307.jpeg
 
twice the pull distance but half the torque
Well, this makes sense...
The result will be bike-specific of course, and even then there's an element of black magic in getting your ratio right.
In my case the studs are so close to the rim for a V-brake, that I'll be getting half the pad travel compared to a typical "modern" V-brake stud.

On a slight offtopic, just found this beauty:

Looks like it was heavily inspired by old time randos. If I was to write-off Frannie at some point, this might be my replacement frameset if I suddenly find myself sitting on a holdall filled with cash.
The colour is quite nice too.

But then, the weight of a large frameset is the same as Frannie, and it's modern cro-mo tubing that's probably a lot stiffer than the incredibly springy Liberia stuff.
Imho, the tubing is half the reason to own an old Liberia - I was even thinking of buying Frannie's sister - a 700c Liberia road bike frameset from the same era.
Then the memory of trying to make all the dodgy French-standards fit together came to my mind and I decided against it.:LOL:
 
Did some work on the brakes today.
For the rear, I've replaced the cantis with a Deore V-brake + Litepro travel adapter. It used to be very spongy & not much braking force, now it still feels a bit spongy, but it's easy to lock the brake if I want to - the bald tyre is the weakest link now. A rando is not much different from a road bike - the rear brake is just there to modulate speed.

For the front, I've dropped the canti cable as low as it would go, and adjusted the yoke angle. A very quick test-ride in the rain suggested that both the stopping power and the feel have significantly improved, so I might keep the cantis in front.
There is some flex in the hanger, but I'm not sure I want to fork out £30 for a tougher one. There's quite a bit of flex in the fork blades/studs (it's a durifort fork, remember). A brake booster would have been great, but I'd need a custom one for my stud spacing - I guess that's only an option if I send some parts for laser cutting, as I can then cut a custom booster out of 5mm stainless steel... Or I can file one out of sheet aluminium by hand :LOL:
I'd be interested to try an extra-wide transverse cable hanger, but I can't find any for sale. I guess, I can try shortening the cable by another few mm.

Need for it to stop raining to test the new set-up in anger, but the forecast says it'll be pissing down for the next 4 days.
 
Back
Top